Make use of Quick Access Toolbar
The Quick Access Toolbar is a customizable set of commands that are available independent of what tab of the ribbon is active. Per default it is empty. You can save time by adding the commands you use most frequently to the Quick Access Toolbar. You can save even more time by using keyboard sequences for the quick access items.
Adding command to Quick Access Toolbar
To add a command you navigate to the desired command in ribbon and right click on it. From the right click menu select Add to Quick Access Toolbar.

Once a command have been added to Quick Access Toolbar you can activate it from its new additional location using mouse by clicking on it.
Using keyboard shortcuts for quick access
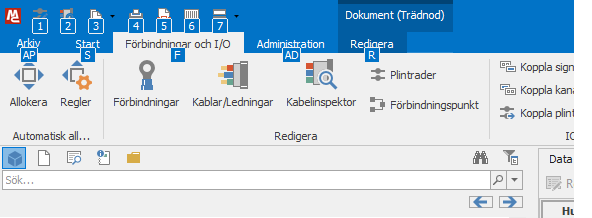
Keyboard shortcuts are automatically assigned to commands in quick access toolbar. To use start by pressing left ALT key. Note that it is not a modifier but an initiator of a sequence. If no additional key is immediately pressed reminders appear which if very helpful when learning to use the keyboard shortcuts. For the top level the automatically assigned shortcuts are digits starting with 1. Your first added item to the toolbar will be activated by Alt 1, the second by Alt 2, and so on.
If a menu is added to quick access toolbar its contents is also automatically assigned keyboard shortcuts. The shortcuts assigned depend on the name of the command.
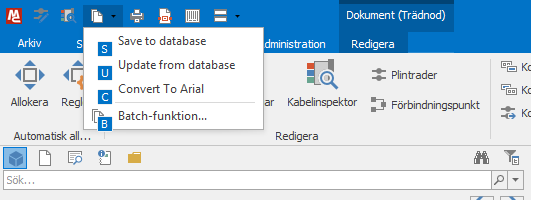
If you plan to configure quick access to something highly configurable like the batch menu or the plugin menu it is a good idea to keep shortcuts in mind when naming the contents of those menus. If you can avoid having the names beginning with the same letters it is preferable.
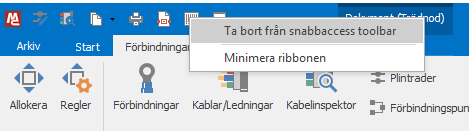
Removing command from Quick Access Toolbar
To remove a feature from the toolbar right click its icon and select Remove from Quick Access Toolbar.