Posts

Configuring the Batch-function menu
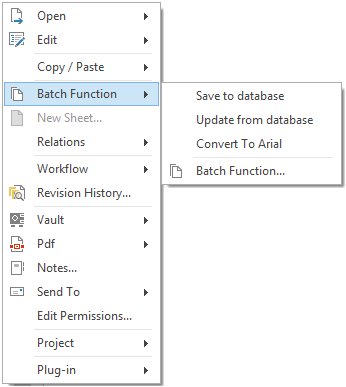
The Batch-function menu in MasterExplorer is configurable and you can easily add your Lsp scripts to it.
Batch-function

Batch-function

The configuration is held in LSPsettings.xml which is located together with your Lsp script files in the \Scripts\Lsp folder at your IdesFileServer. Below is an extract showing the configuration for one script file.

<LispFunctionSetting>
<FileName>UPDATE</FileName>
<Description>Update from database</Description>
<CheckOut>true</CheckOut>
<ShortCut>true</ShortCut>
</LispFunctionSetting>


FileName is the name of the file without extension. Extension of the file must be .lsp as that is the only supported extension.

Shortcut determines wether it will be shown in the right menu.

Description is the text presented to the user.

CheckOut determines if the documents will be checked out and in by the batch engine.

The setting that deserves the most attention is the CheckOut flag. Consider what your script file does and set the flag accordingly. After the batch engine checks the drawing out and performs the batch actions it will check the drawing in again. In the case you’ve got project management the check in will be project logged.

It is quite common that batch functions are used to plot and in that case it is often prefereable not to check the drawings out. If set true the batch engine will halt on error if your batch cointains drawings that are not allowed to be checked out. Reasons to not allow check out could be that the drawing is approved or in the case of project management that the drawing is currently involved in a project other than the users active project.

Set which AutoCAD to run elMaster Design

When starting elMaster Design the application start will first start the AutoCAD you used last and then load elMaster Design functionality. If there are more AutoCAD products installed you need to make sure the desired product is the one you had last started before starting elMaster Design. Assuming you always want the same version and product there are settings to make switching applications easier.

Settings for MasterConcept

The configuration of what application to start is found among the document settings; Administration > Settings > Document > Document type. Go to the tab Document Start and look for the columns External Application and Switches.

External Application & Switches

Currently using AutoCAD 2015 while trying out 2016.

The column Switches works very much the same way as adding switches to a program shortcut. The following switches are supported both as shortcut and document start setting.

/product is passed on to AutoCAD and accepts the same input as the native AutoCAD switch. It expects a product shortname like; ACAD, ACADM, MEP

/acadver accepts version as written in the name of the vertical; 2014, 2015, 2016. Version numbers on format R19.1 are currently not supported. Please note that support for this switch was intruduced in 12.2.2.

/p is the native AutoCAD switch for profile. For some starts you may have to refer to an existing profile to get the desired environment. If no profile is specified AutoCAD will be launched and AutoCAD will continue using which ever profile is current.

When setting external application to MasterDesign the Design profile is loaded by the document start and there is no need to specify profile.


Settings for stand alone elMaster Design

The switches above are supported by stand alone elMaster Design by editing the shortcut adding the desired switches.

Shortcut with switches

Shortcut with switches


Depricated

Edited. The tags described below are depricated from 12.3 and the above alternatives are  recommended. Tags are only to be used for older AutoCAD versions before acad.exe had support for the product switch.

As an alternative the settings are also available through the settings file.
%appdata%\Ides\Master Concept 12\Cfg\IdesSettings.xml

IdesSettings.xml

Tags in IdesSettings.xml

To set a preferred version of AutoCAD add the tag SelectedAutoCADVersion and a version number such as; 2014, 2015, 2016.

To set a preferred AutoCAD-product add the tag ElmasterAutoCADProduct and a product shortname like; ACAD, ACADM, MEP.

Larger drawing area for small screens

For those of you who use elMaster Design on laptops with small screens there are some tweaks one can do to improve the drawing area. Minimizing toolbars to improve the drawing area can also be useful for those users who spend a lot of time reviewing drawings.

Minimize to improve drawing area

Minimize these to improve drawing area – Click image to see full size

1. Size of ribbon can be set to text only menu, a compromise or a full size ribbon page.  If you prefer how elMaster Design looked prior to the introduction of ribbon you can mimic that appearance using this setting. If you are reviewing and do not intend to work with the drawings you can save even more screen area with RIBBONCLOSE to hide the ribbon. Use RIBBON to show it again.

2. Ides Toolpalette can be docked. If you by accident close it you can have it opened again using IDESTOOLPALETTE.

3. Hide the command line with Ctrl+9 or COMMANDLINEHIDE. As an alternative one can undock it to have it floating in the drawing area which allows for a larger drawing area.

Large drawing area

Large drawing area – Click image to show full size

Search in AutoCAD to find commands

AutoCAD comes with a neat search feature. It is useful for those occasions when you don’t recall what the icon to find that command you’re looking for looks like or where in the ribbon it can be found. There is also the case with uncommon commands that do not have an icon in the ribbon. If you know what you’re looking for it’s quicker to search this way compared to searching in the help.

AutoCAD search feature

AutoCAD search – Click image to see full size

Note that how the search result is presented it shows you at which ribbon page the command is located. It lets you know where to find it next time.

AutoCAD Error Report

Sometimes when you close elMaster design or proMaster design you get an AutoCAD Error Report. This error can be found in version 11.0 and version 12.0. The error in itself is harmless but somewhat irritating. We have now found a solution that will remove the error from occurring.

AutoCAD Error Report
Solution

The solution is to turn of the AutoCAD InfoCenter Toolbar and then you will no longer get the AutoCAD Error Report
InfoCenter
This can be done in two ways:

  1. Change in register. For example the AutoCAD 2015
    “HKEY_CURRENT_USER\Software\Autodesk\AutoCAD\R20.0\ACAD-E001:409\InfoCenter\InfoCenterOn” to 0
  2. Run this Lisp in the Command Prompt in AutoCAD, This lisp command can be added to the EPC_HOOK.LSP. But it only needs to be ran once to solve the problem.
    • (progn (vl-load-com) (vl-registry-write (strcat “HKEY_CURRENT_USER\\”
      (vlax-product-key) “\\InfoCenter”) “InfoCenterOn” 0))